Chinese Gate
Created: December 2016
Unreal 4 Engine Art Project

This all started from an image I saw on the Level Design Inspiration Machine Tumblr blog of a temple gate.
It took about 10 hours altogether, including learning the Unreal 4 pipeline (to a degree) and creating assets.
I built the terrain, stairs and the gate in Maya. Materials for the terrain, stairs and gate were sourced online and edited in Photoshop.
I used Crazy Bump to make the normal maps and specular maps.
The foliage and rock props were downloaded from the Unreal asset store for free. (The Open World Demo Collection)

I started with the first image, and later found the second while doing more research into the gate's origin.
The gate was right off of a small paved road on the outskirts of Taipei. It lead to a complex of temples called
Pu An Tang.
It was built in 1914. In 2014 it was razed in a land dispute.
This Goolge Street still shows it, but besides that I had a real hard time placing it. Thanks to Reddit r/translator for the assistance.
A surprise reward was learning the history and location of this gate. It's especially disappointing to find that it no longer exists.
The first image is somewhat popular, and the internet largely refers to it as "Japanese Temple Entry". The architecture is all wrong for Japanese, but I'd be lying if I said I knew that from the get go.


The first step: block something in.
I hadn't used Unreal 4 for anything real before so there was a small learning curve of figuring out the pipeline.
I built one half of the gate, then mirrored it. The gate is one unique prop and the terrain and steps are another.


I've never built foliage props, and learning that wasn't the goal for this project.
Luckily, the Unreal asset store had a great, free pack of assets that worked perfectly.
I used the assets to block in a general framing of the shot I was trying to make.


Blocking in materials for the ground and gate. I used a handful of free texture websites to try different looks and learned how to make materials in Unreal. Luckily, it was very easy.


I spent my next session working on lighting. I also applied more temp materials to my meshes and started propogating more foliage to the scene. This pass in the middle of a project helps me understand how far I am from the final product, and keeps me putting effort in the areas that need them most. I also bookmarked this specific view in the editor and returned to it often.
The benefits of making a screenshot and not an explorable environment!


Here are most props placed and textures applied to all parts of the meshes, even if they weren't the final textures. Embarassingly, I used Japanese Kanji here. I didn't know what language was being used and wanted a palceholder.


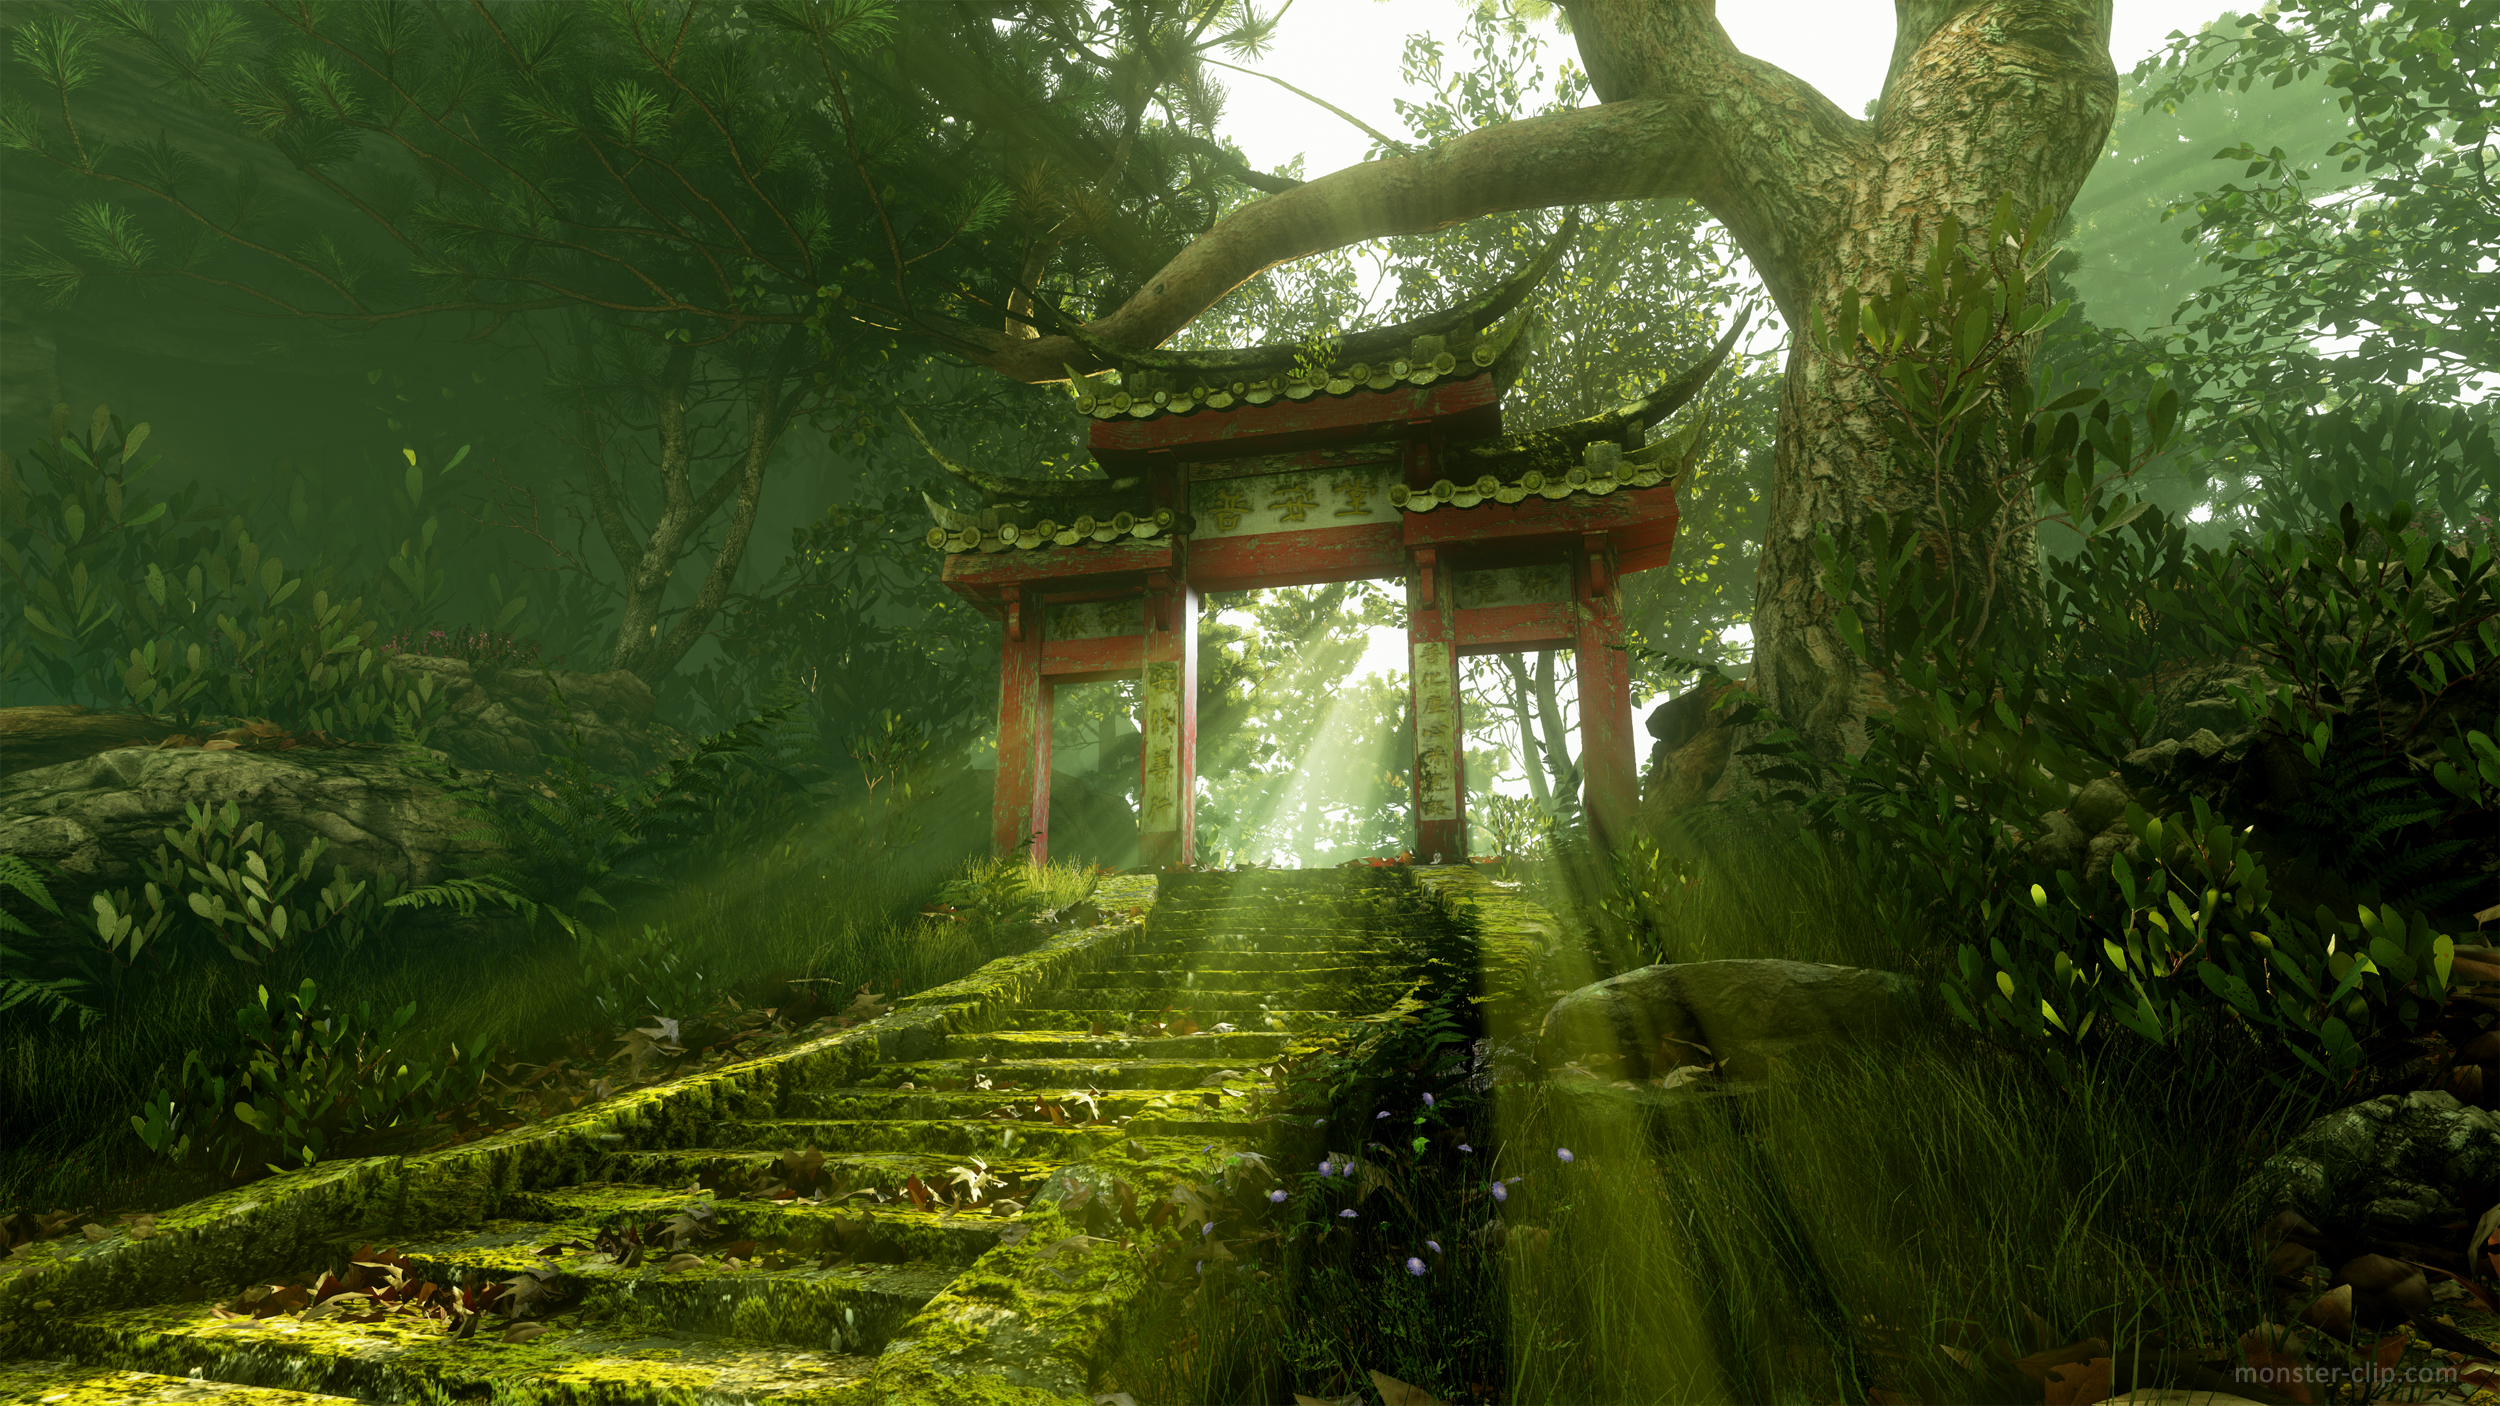
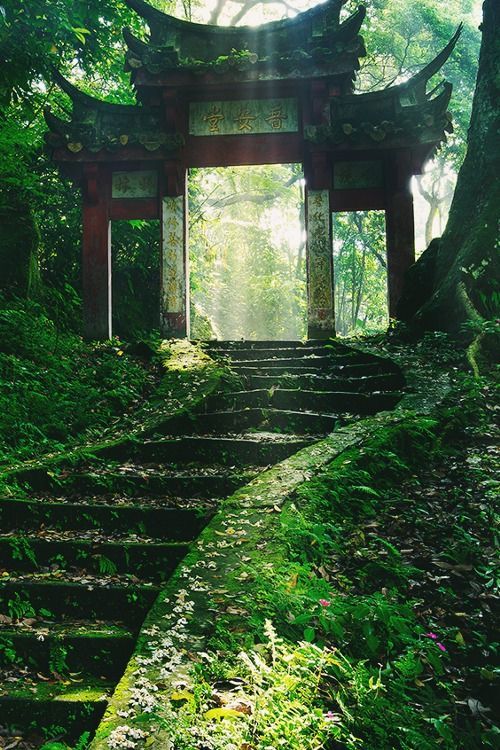
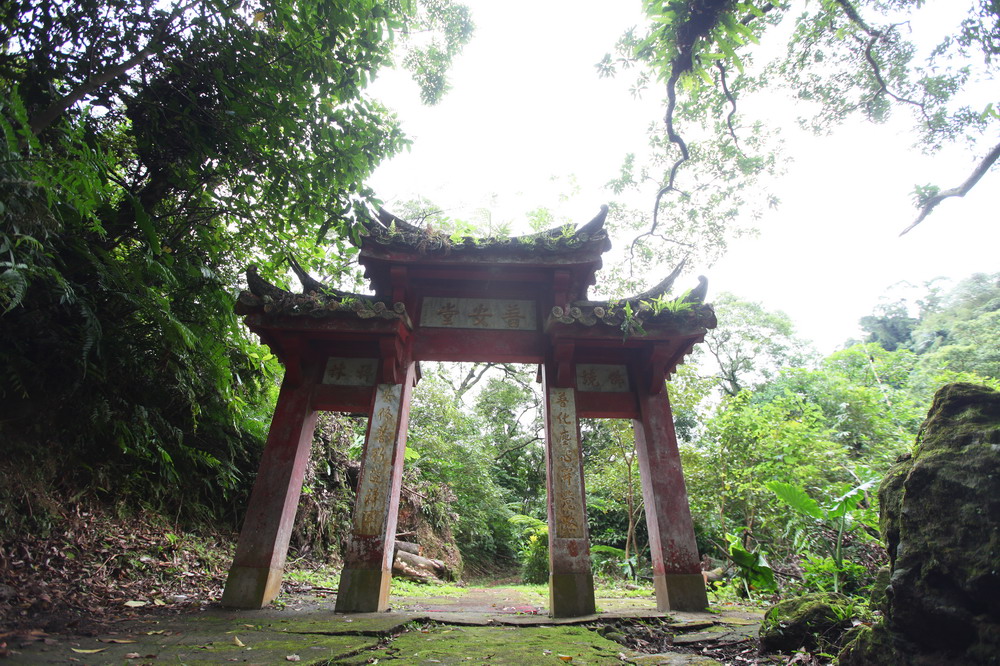
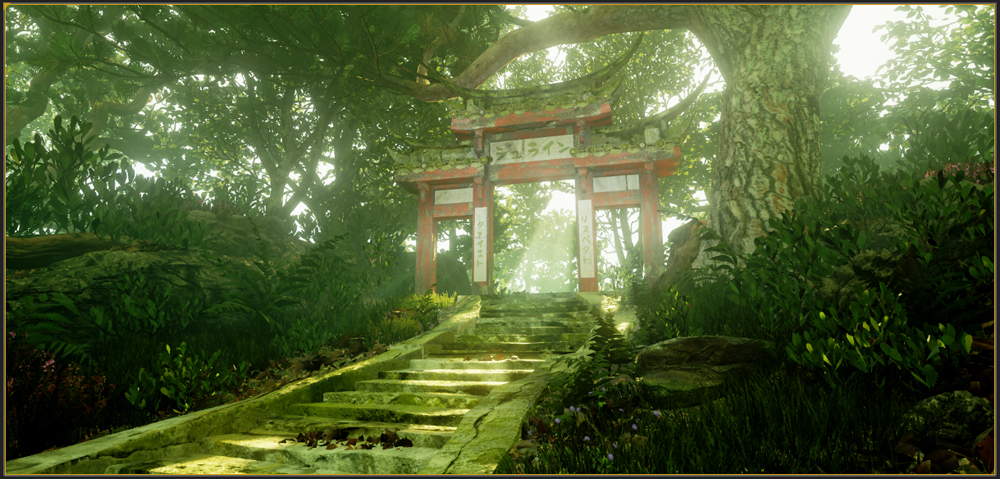
It was time to finish up, which meant actually knowing what the gate was saying. After some research, I learned it was Chinese. I used that info to recreate the (mostly) correct wording.
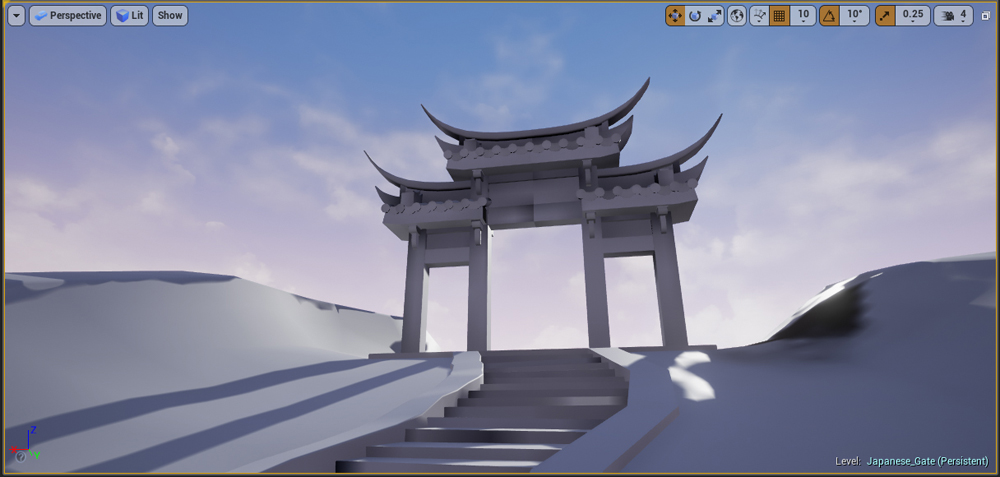
I also did final polish, like fixing some texture tiling, improving the geo on the stairs and adding grunge to the signs.  The tree trunk was as an eye sore, so I used some foliage to hide it.
The cliff wall on the left helped frame the scene better, as the stairs lead your eyes from the bottom, through the gate and to the light.
Finally, a post processing volume, which added some much needed color tweaking, contrast and ambient occlusion.

This is the final product. Here is a large version.